From the FAQ Library:
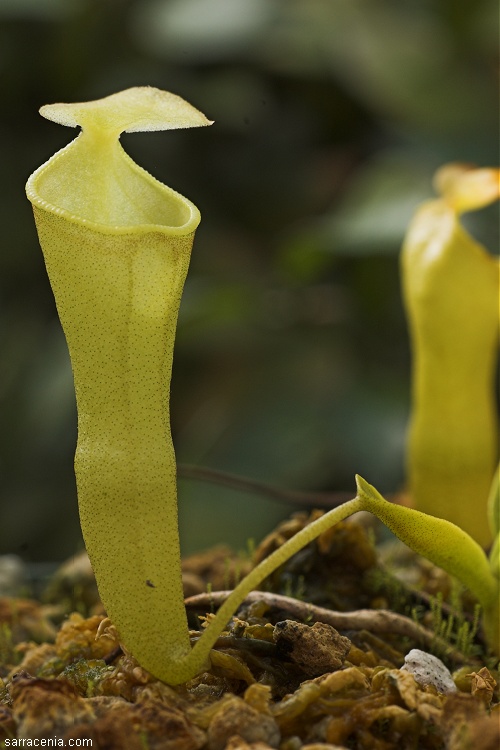
Nepenthes campanulata
from TC
As an immediate disclaimer, I must reveal to you, oh trusting FAQ reader, that I have never done tissue culture. While I
have left sealed containers of food in the refrigerator for far too long, just to discover later on the many interesting
organisms growing in there, I don't think this counts. However, I have done a bit of research on this topic and have some basics
on tissue culture for you here. I hope you enjoy!
Tissue culture is a term with a number of definitions that varies by the user; here I will use it to mean the propagation and
multiplication of plant cells in artificial conditions in sterile (or near sterile) conditions. The "artificial conditions"
usually means in sealed glass or plastic containers, in an agar medium dosed with certain chemicals, instead of the old standby
substrate of sphagnum moss or peat:sand!
Tissue culture has been with us since the late 19th century, and while it has become very technically advanced, some of the
basic methods are relatively easy to maintain. With the same amount of effort required to make a carnivorous plant terrarium,
the enthusiast could also make the kind of sterile environment needed to produce "cultures" and multiply those cultures
into additional dishes or test tubes as they grow. A surprising number of carnivorous plant growers use tissue culture to some
degree, and refer to the technique simply as "TC." Tissue culture is a useful tool for conservationists, because when rare
species such as Nepenthes are discovered, these plants can be reproduced in great quantity by tissue culture means.
Below I describe some of the basics of how tissue culture is performed. For a more detailed discussion, refer to Darnowski (2004).
A particular challenge for the tissue culture worker is developing and maintaining sterile conditions. Since the plant cells
will be grown in a laboratory medium rich with nutrients, any microorganisms or fungi that manage to invade growing chamber
will rapidly reproduce and overwhelm the plants you may be trying to culture. For many carnivorous plants, killing all the
unwanted organisms (i.e. developing an "aseptic" environment) while not killing the plant cells is very difficult! Every
tool, every dish, every ingredient, must be sterilized using an autoclave or at least something like a pressure cooker.
Tissue culture practitioners first must create their media-the nutrient rich solution that will house the chunk of plant
cells that will be encouraged to reproduce and grow. There are several different formulations that carnivorous plant growers use,
and these all contain macronutrients, micronutrients, vitamins, sugar, and other ingredients. Common formulatiosn are called
"Murashige and Skoog," "Linsmaier and Skoog," and "B5," also known as "Gamborg's Medium."
The media should not be used straight for carnivorous plants, but should be diluted to 5-20% normal concentration. Darnowski, for
example, uses a mixture of 20% MS/B5 and 3% sucrose, and has had success with Cephalotus, Drosera, Genlisea,
Heliamphora, Pinguicula, Sarracenia,
and Utricularia.
The nutrient rich medium is transformed from a fluid into a semisolid gelatin by the addition of Agar, or inert components like
cotton balls. Obviously, aquatic species would be fine without the addition of agar or cotton, so this should be dispensed with
if you are trying to culture aquatic Utricularia, Genlisea, or Aldrovanda. Agar is sold dry, and is used at
about 1% concentration (Darnowski uses 0.8%). Once the nutrient and agar components have been combined, they must be heated almost
to the boiling point to complete the mixing, and also must be sterilized.
A small layer of the growing medium should be poured into your growing containers. Some people use glass jars for this--they can be
reused. Others use plastic containers, some of which cannot be reused. Experience will tell you if plastic containers fresh from the
manufacturer can be used without sterilization--not all plastics can survive the heat of an autoclave!
Next, the plant sample must be prepared. This is where the realm of strict science leaves, and is replaced by skill, art, and
luck. The plant specimen, usually a chunk of tissue no more than a cm or so on a side, is selected. For some species, such as
diminutive Drosera, you will clearly be working with much smaller specimens! The origin of the plant material
depends upon the species, and you will have to talk with other practitioners for ideas. For example, in Sarracenia, the
important tissue for your work appears to the be cells at the apical meristem of the rhizome (i.e. the growth bud). Unfortunately,
Sarracenia grow relatively slowly, so harmless fungi that grow inside the plant tissue of Sarracenia are often
transported into the tissue culture environment, and can spoil the culture.
The chunk of tissue is sterilized on the surface by rinsing it in 70% ethanol, then washing it with a solution of
0.5-4% bleach (NaOCl, sodium hypochlorite), or something similar such as CaOCl (calcium hypochlorite). A 0.1-1% addition of
Tween 20 (polyoxyethylene sorbitan monolaurate) is added to the bleach solution. This adjuvant functions as a surfactant,
or wetting agent, to enhance the ability of the bleach to penetrate cracks in the plant sample to more fully sterilize the
sample. The plant specimen is then rinsed with sterilized water to remove the toxic bleach, and your specimen is ready.
Experienced tissue culture practitioners have reported that particularly difficult plants such as Sarracenia do not respond
to this simple treatment well because of the fungus growing in the tissues. For these plants, the tissue sample must in
essence be peeled--a layer should be stripped away from all the surfaces of the specimen--and then the entire sterilization
process should be repeated. This should be done a number of times, and even after such repeat treatments, the final product
may still be infected with fungus. Often, the plant tissue is killed by the process. Tissue culture is not always easy!
The sterilized specimen is transferred to the jar with medium, and covered with a lid. The lid is sealed with a waxy tape
called parafilm, while others simply use conventional transparent tape. Tape helps keep the culture sterile, and also reduces
the loss of water. If the water is successfully maintained in the jar, you will not have to disturb the specimen for many
months, and the plant cells will have an opportunity to grow.
Once you have created your specimens, you must keep them alive! The sugar in the media actually provides for the
energy needs of the plants, so they do not need to photosynthesize. However, light will encourage the production of
normal plant structures. Because of the sugar, light levels do not have to be as bright as they would be for normal
carnivorous plant cultivation. A few bulbs no more than 15 cm (6 inches) from the plants will be fine. Watch the
temperatures inside the jars, and make sure they do not rise too much above 23C (75F) or so. A small thermometer kept
in a sealed jar with your specimens is a useful precaution.
As the plant specimens grow, you will have to watch for invasions of bacteria or fungi. Contaminated jars are best discarded,
but if the specimen was difficult to obtain you may try to carefully excise the uncontaminated portions of the specimen and transfer
it to a new jar. When the specimen begins to grow, it may look like an ugly little mass of undifferentiated plant cells. But
when the specimens become large enough, they usually start producing normal structures such as leaves. Some plants do not do
this well, and hormones some growers think special hormones or cultural treatments encourage the production of such organs.
Discuss these subtleties with other practitioners to seek advice.
Ultimately, the plants will become large enough they can be removed from sterile culture. This process is called deflasking,
a term come to us from the large tissue culture practices in the orchid trade, where countless orchid plants are grown in
flasks. Deflasking is a process that even those who do not wish to grow carnivorous plants in media may have to learn to do.
This is because many carnivorous plants are sold internationally in sterile tissue culture media. Deflasking must be done carefully
or else the plants will die, and if it is done incorrectly, the plants will die within hours. Since errors in deflasking can r
esult in such instant death, many of those who are unfamiliar with tissue culture techniques are very uncomfortable with buying
plants in media. But with appropriate precautions, deflasking is a straightforward process. The key is not to shock the plants.
If you obtain plants from a tissue culture supplier, decide if deflasking really is necessary. If the plant is obviously not
drying out, if there is still plenty of agar medium, why deflask the plant yet? Also look to see if there is no obvious bacterial
or fungal contamination. Contamination is easy to see--look for some kind of grey or noxious looking growth in the medium, the
kind that would cause you to discard a container of food if you found it displaying a similar growth. If there are no warning signs,
then keep the plant in the flask. If it was shipped to you, the plant is probably a little disturbed by the jostling, and a few more
weeks in its nice flask would be fine for it. If the plant has been dislodged from the medium, gently knock the flask a few times in
a way designed to reorient the plant root zone downwards. If your plant does not have roots, try to wait and see if it develops any.
Roots help enhance the survival rate during the deflasking process.
Once you are ready to deflask the plant, prepare a suitable growing area. Remember that the plant has been living in an environment
free of pests and competition, with all its food needs provided for it, in 100% humidity. The primary cause of death for deflasked plants
is humidity shock. Even if your plant consists of a mass of myriad plantlets, resist the temptation to try to separate them at this
stage. I have never seen this result in anything other than dead plants and tear-streamed faces. Transfer the plant into its new container,
and then put the container in a clear plastic bag with plenty of water. I have seen tissue culture plants begin to wilt within a few
short minutes, so have everything ready before you open the tissue culture jar. Remove the agar from the plant, but do not do this so
fastidiously that you damage the roots. A little agar medium will not damage the plant, but too much will encourage fungi and
bacteria that will feast upon the tissue culture medium. Seal the baggie, and wait a week to see if the plant dies. Then,
proceeding slowly over the next few or several weeks, acclimate the plant to your environment by punching a few small holes in the
baggie, and slowly enlarge the holes. If you see wilting occur, back off on the acclimatization process. If your plant does not
have roots, be particularly cautious. For many plants, I like to wrap them in strands of living Sphagnum plants. I believe this
helps create a humid microenvironment that helps sustain them. If you are lucky, patient, and careful, your plants will harden off
well and you will have a new plant in your collection. With practice, luck will become a less crucial ingredient to the process.
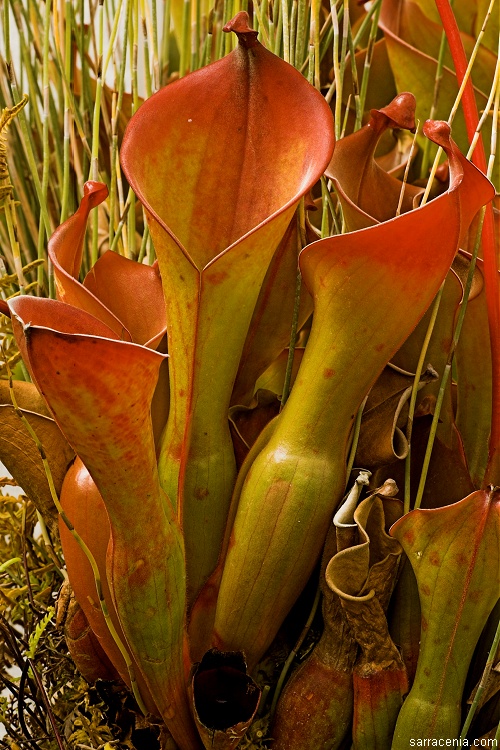
Heliamphora nutans
I have observed an interesting phenomenon regarding tissue cultured carnivorous plants. Once deflasked, carnivorous
plants often grow at a tremendously accelerated rate, and seem impervious to many of the problems that would kill other plants of
more conventional origin. For example, I have deflasked Heliamphora and grew these side-by-side with Sarracenia
in an arid, hot greenhouse. Previous attempts to grow Heliamphora, even of the same species, in these conditions resulted
in resounding failure. But the Heliamphora grew splendidly and transformed from tiny plants to juvenile specimens
15 cm (6 inches) tall within a single year. Similarly, deflasked Sarracenia have grown from only a few cm (1 inch)
tall to maturity, and even flowered, within 15 months in my care. Deflasked Nepenthes often show a bushy growth with
countless lateral branches, all on plants only several cm (a few inches) tall. Unfortunately, this accelerated growth is not permanent.
Within a few years the plants revert back to normal growth, and sensitive plants once again become sensitive. What is the
cause for this behavior? The prevailing wisdom is that for a few glorious years, the deflasked plants have a smaller number
of unwanted internal organisms--bacteria, fungi, and the like--and so can grow at enhanced rates. In time, these organisms
invade the deflasked plants and normalcy returns. Is this really the case? I have seen no studies buttressing the theory. This
would be an interesting field for study. And if it were proven, think of the horticultural gains that could be realized if a
way could be devised of reducing the parasitic load on plants in conventional plants in cultivation! Or perhaps this is only
the realm of speculation for mad scientists bent upon unleashing botanical atrocities upon the unsuspecting populace!
If you wish to explore tissue culture yourself, you will need the appropriate equipment. You will need some specialized
hardware such as scalpels, forceps, scissors, and Petri dishes. All these can be bought on the internet or at University campus
bookstores. Exactly which tools you need will depend upon your arrangement--do not expect to get all your equipment on one trip.
You will also need a way of sterilizing these tools. This is done by dipping them in a container of 95-100% alcohol, then
heating them in a sterilizing flame. A candle is not sufficient for this! You will need something like an inexpensive alcohol
lamp flame, or a heated sterilizing device containing either a ceramic cylinder or a heated container of glass beads--these
are significantly more expensive, but conveniently operate from an electric outlet. The other ingredients described above can
be purchased from biological supply companies. The small but strong hobby interest in the technique helps keep the costs of these
supplies reasonable. Search the web for products. Also, keep an eye on saving money by using inexpensive alternatives (such as
plastic food jars instead of glass containers, or table sugar instead of scientific-grade sucrose). Autoclaves are also
easily available and for smaller volume programs (such as yours) can be very affordable. A pressure cooker can be used,
as mentioned.
One ingredient you will not be able to purchase is a steady hand and a great deal of patience. Do not attempt tissue culture
techniques when you are overly dosed on caffeine or sugar! Furthermore, do not work to the point of frustration, especially when
dealing with difficult and small specimens. You must proceed carefully at all stages, especially since you may be working with open
flames, concentrated alcohol, sharp blades, and bleach solutions--those ingredients could be combined a number of ways that would
result in a trip to the emergency room of the nearest hospital. Chemical burns, lacerations, and scorched flesh are never pleasant
to deal with.
Perhaps the largest barrier to home tissue culture is constructing an area for you to do your sterile work. You need to create
a sterile chamber with enough room for all your supplies and sterilization equipment. The chamber should be convenient and
comfortable to work in. The easiest chamber, and the first that most people start with, is a simple box with a clear roof of
plastic. The box should have a set of holes for you to extend your arms into. While it may look neat to attach plastic glove
and arm covers to these holes, the best procedure is to simply take any jewelry off your hands and warms, wipe them down with
70% ethanol, and begin. Some prepare there chamber by sterilizing it with a spray-down with a bleach solution. Radiation from
an ultraviolet lamp (i.e. black light) for 30-60 minutes can also kill spores and microbes. Use a fluorescent bulb as close as
possible to the work area, and illuminate the entire sterile zone. Do not work with the bulb operating. A more expensive but
effective method is to buy or build a laminar flow hood, which operates by pumping a steady stream of sterilized air over the
cultures. This ensures that microbes do not blow into the chamber while you work. You can build either kind of chamber yourself
using plans on the internet or in specialized books. Tissue culture is essentially its own hobby, and you will learn a great deal
in the process. Useful sources of information can be found in the library. Look also to other disciplines that require sterile
laboratory procedures. For example, orchid growers used tissue culture extensively. Also, basement mushroom growers use sterile
techniques in developing cultures of mushroom "spawn." There are many resources available that cater to home mushroom growers,
especially since mushroom growing can be quite lucrative for those involved in growing psychoactive and extremely illegal
species!
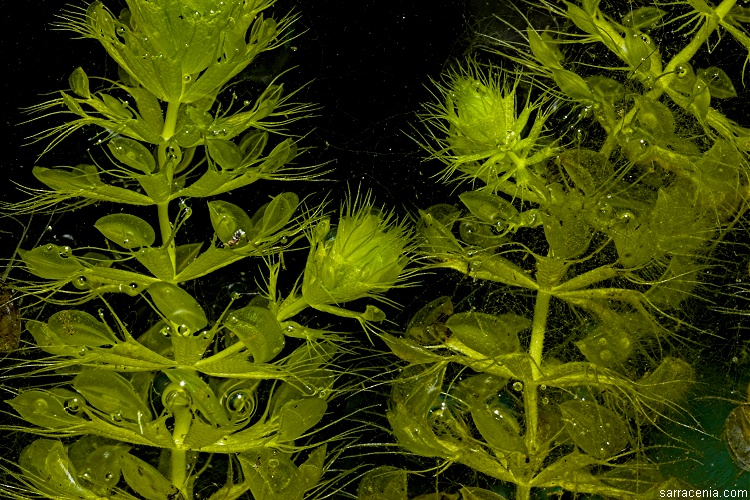
Japanese Aldrovanda
Tissue culture has great potential for enhancing conservation projects. Once a plant specimen is successfully introduced into
sterile culture, it can be propagated easily using sterile techniques. Plants in sterile culture can be multiplied at a much higher
rate than plants in greenhouses. While a conventional horticulturist may be able to multiply a mature Nepenthes into a dozen plants
in a few years using stem cuttings, a tissue culture practitioner could transform a single culture into a vastly unmanageable number
of plantlets in the same time. So what does this mean for conservation? Since all the plants in sterile culture are genetically identical,
this is not a suitable method of reproducing plants for the reintroduction to the wild. However, it is an excellent way to propagate
plants for the consumer market. If enough plants are provided to the public, it is possible that poaching pressures on the wild populations
may be diminished. Of course, it is also possible that the ready availability of plants in tissue culture may only enhance collector
interest in the plants, thus increasing poaching pressures. Probably, the best solution would be to have several lineages of
each rare species in tissue culture, so even the more voracious collectors could not have room for them all. Tissue culture also has
viable conservation applications in those sad situations in which only a few genetic lineages of a plant remain. For example,
Katsuhiko Kondo in Japan has demonstrated that tissue culture is a viable way of preserving the only lineage of Aldrovanda
that remains in Japan. Is this the future for Aldrovanda, which is rapidly disappearing throughout its
range?
Tissue culture also has great application in propagating plants purely for ornamental horticultural purposes. Many horticultural
selections of carnivorous plants have been introduced to tissue culture. Unfortunately, at least for
Sarracenia and Nepenthes, it is extremely difficult to obtain fungus-free cultures. For these genera, it is much easier
to establish lineages in sterile culture by carefully bleach-sterilizing seeds and then growing stock from these germinations.
This may be a fine approach if one merely wishes to establish a species into tissue culture, but if a fine horticultural selection
has been developed by conventional cultivation means, it is difficult to establish such a lineage in cultivation. For example, as of
2006 the extremely desirable cultivar Sarracenia 'Adrian Slack,' considered by many to be the most spectacular
Sarracenia hybrid known, has resisted all attempts at insertion into sterile cultivation. Only by conventional propagation
methods at the University of California have plants been slowly leaking out to the public.
Tissue culture also has possibilities for innovative studies in speciation, especially for loosely separated groups of plants.
In 2000, Katsuhiko Kondo astonished attendees of the International Carnivorous Plant Societies annual meeting when he
showed the results of his tissue culture work on plants in the Drosera petiolaris group. There, among his vials of
tissue culture clones of the same genetic lineage of plants, was one vial that looked different. Somehow, in the rapid cell
divisions that occur during tissue culture growth, one of the plants had somehow mutated into a plant of a completely different
species! Let the practitioners of tissue culture keep their eyes wide open, and look for surprises!
Page citations: Darnowski, D. 2004; Rice, B.A. 2006a; personal observations.